Generate Images
crm-appearance shows a preview image for every clothing item. This guide walks you through generating those images and converting them to an optimised format.
Download screenshot-basic
Download the official screenshot-basic resource.
Use screenshot-basic only — alternative screenshot resources are not supported.
Download crm-screener
Download crm-screener and place the folder directly inside your resources directory — not inside a sub-folder:
Prepare the server
Before generating, make sure nothing interferes with the process:
- Stop your weather script.
- Stop any AFK scripts.
- Don’t leave the server until the generation has finished.
Start the generation
Connect to your server and run the command:
/crm_screenThis generates every clothing image and saves them here:
Convert the images
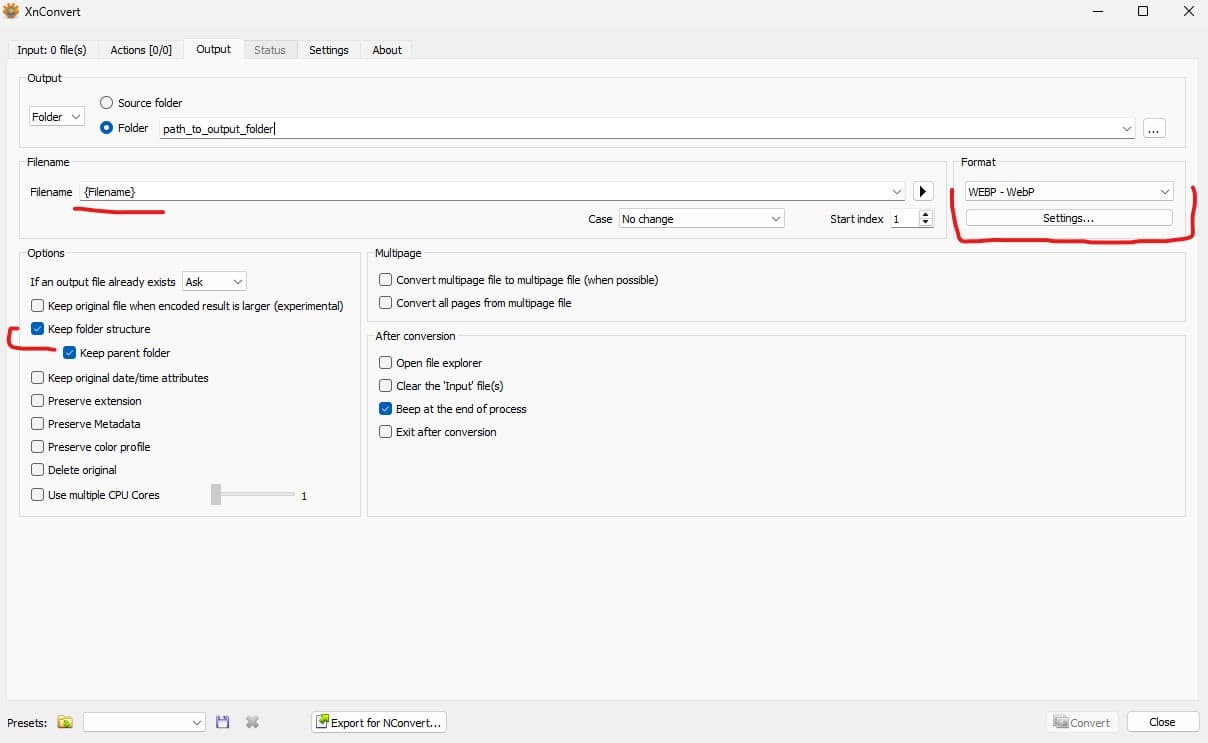
The generated images are .png. Convert them to .webp to dramatically reduce their file size, using XnConvert.
- Open XnConvert.
- Drag every file from the crm-output folder into the program.
- Open the Output tab and set:
- Filename:
{Filename}(do not use{Filename}_results) - Output folder: wherever you’d like the converted images saved.
- Enable Keep folder structure.
- Enable Keep parent folder.
- Format:
WEBP — WebP
- Filename:
- Click Convert and wait for it to finish.
Copy the converted files
Copy these four folders from the converted output into crm-appearance:
crm-facescrm-overlayscrm-compscrm-props
Place them here: